Dev Center
Build the HelloWorld Page
Before you start, please make sure you’ve downloaded and installed the latest version of
DWT. If you haven’t done so, you can get the 30-day free trial installer here.
The following steps show you how to create your first web-based scanning application in a few minutes!
Start a Web Application
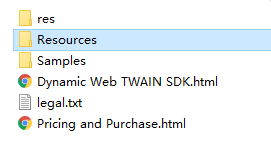
Create a helloworld.html anywhere and copy the Resources folder to the same location. You can typically find this folder in C:\Program Files (x86)\Dynamsoft\Dynamic Web TWAIN SDK {Version Number}\
-
Resources
-
The project

Include the library
Embed the script of the library and add a div element for the library on the page.
<script src="Resources/dynamsoft.webtwain.initiate.js"></script>
<script src="Resources/dynamsoft.webtwain.config.js"></script>
<div id="dwtcontrolContainer"></div>
“dwtcontrolContainer” is the default id for the div. You can change it in the file
dynamsoft.webtwain.config.jsif necessary.
Write code to scan
Add a scan button and the minimum code.
<input type="button" value="Scan" onclick="AcquireImage();" />
<script type="text/javascript">
    var DWObject;

    function Dynamsoft_OnReady() {
        DWObject = Dynamsoft.DWT.GetWebTwain('dwtcontrolContainer');
    }

    function AcquireImage() {
        if (DWObject) {
            DWObject.SelectSource(
                function() {
                    DWObject.OpenSource();
                    DWObject.AcquireImage();
                },
                function() {
                    console.log("SelectSource failed!");
                });
        }
    }
</script>
Review the complete code
<html>

<head>
    <title>Hello World</title>
    <script src="Resources/dynamsoft.webtwain.initiate.js"></script>
    <script src="Resources/dynamsoft.webtwain.config.js"></script>
</head>

<body>
    <input type="button" value="Scan" onclick="AcquireImage();" />
    <div id="dwtcontrolContainer"></div>
    <script type="text/javascript">
        var DWObject;

        function Dynamsoft_OnReady() {
            DWObject = Dynamsoft.DWT.GetWebTwain('dwtcontrolContainer');
        }

	function AcquireImage() {
	   if (DWObject) {
		    DWObject.SelectSource(
			function() {
			    DWObject.OpenSource();
			    DWObject.AcquireImage();
			},
			function() {
			    console.log("SelectSource failed!");
			});
	       }
	   }
    </script>
</body>

</html>
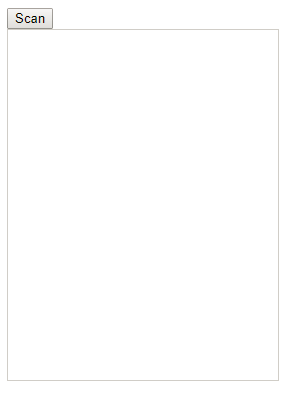
See the scan page in action
-
Open the page in your browser
If you see a license notice, please make sure you have a valid trial license. Contact Dynamsoft Support if you need help.
-
Press the Scan button
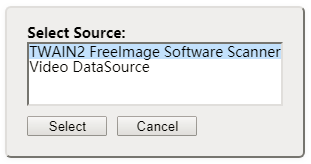
Only TWAIN / ICA / SANE compliant devices are listed in the Select Source dialog. If your connected scanner doesn’t show up in the list, please make sure the proper driver is installed. If you are using Windows and don’t have a real scanner at hand, you may install the Virtual Scanner – a scanner simulator which is developed by the TWAIN Working Group for testing purposes.
-
After scan
The scanned documents will show up in the page.

Upload the document as a PDF via HTTP Post
After scan, you may want to upload the scanned documents to a server. So as the last step in creating the hello world application, the following shows how to upload the scanned documents as a PDF file.
Add an upload button in HTML
<!-- Add a button -->
<input type="button" value="Upload" onclick="UploadAsPDF();" />
Add code to do the upload
The method HTTPUpload is used to do the upload.
function UploadAsPDF() {
    var url = Dynamsoft.Lib.detect.ssl ? "https://" : "http://";
    url += location.hostname;
    var path = location.pathname.substring(0, location.pathname.lastIndexOf("/") + 1);
    url += location.port === "" ? path : ":" + location.port + path;
    url += "saveUploadedPDF.aspx";
    var indices = [];
    if (DWObject) {
        if (DWObject.HowManyImagesInBuffer === 0) {
            console.log("There is no image to upload!");
            return;
        }
        // DWObject.SelectAllImages();
        indices = DWObject.SelectedImagesIndices;
        DWObject.HTTPUpload(
            url,
            indices,
            Dynamsoft.DWT.EnumDWT_ImageType.IT_PDF,
            Dynamsoft.DWT.EnumDWT_UploadDataFormat.Binary,
            "HelloWorld.pdf",
            function() {
                //The server response is empty!
                console.log("Successfully uploaded!")
            },
            function(errCode, errString, response) {
                console.log(errString);
            }
        );
    }
}
Write the server script to receive and save the uploaded file
On the server side, any script language can be used (ASP. NET, JSP, PHP, etc.). Here we are using ASP. NET (C#) as an example. Check out more here.
RemoteFileis the default field name for the uploaded file. So we use it to extract the file from the Post Request. This field name can be changed with the API HttpFieldNameOfUploadedImage.
Create a saveUploadedPDF.aspx file in the same location as your helloworld.html and write the following script in it.
<%@ Page Language="C#" %>
<%
    try
    {
        String strImageName;
        HttpFileCollection files = HttpContext.Current.Request.Files;
        HttpPostedFile uploadfile = files["RemoteFile"];
        strImageName = uploadfile.FileName;
        uploadfile.SaveAs(Server.MapPath(".") + "\\" + strImageName);
    }
    catch
    {
    }
%>
Now we can use the page to scan or acquire, then upload the images as a PDF document.